Pages

Pages

Tuesday, March 31, 2015

Kid Art: Coffee Filter Easter Eggs


As most of you know I enjoy helping Liam and Chloe make homemade cards & art for the holidays. With Easter right around the corner I figured we should get-to-making some cards prior to this weekend.

Last year was Chloe's first Easter and we made cute little cards using Liam's and Chloe's finger prints: Little Chick Easter Cards

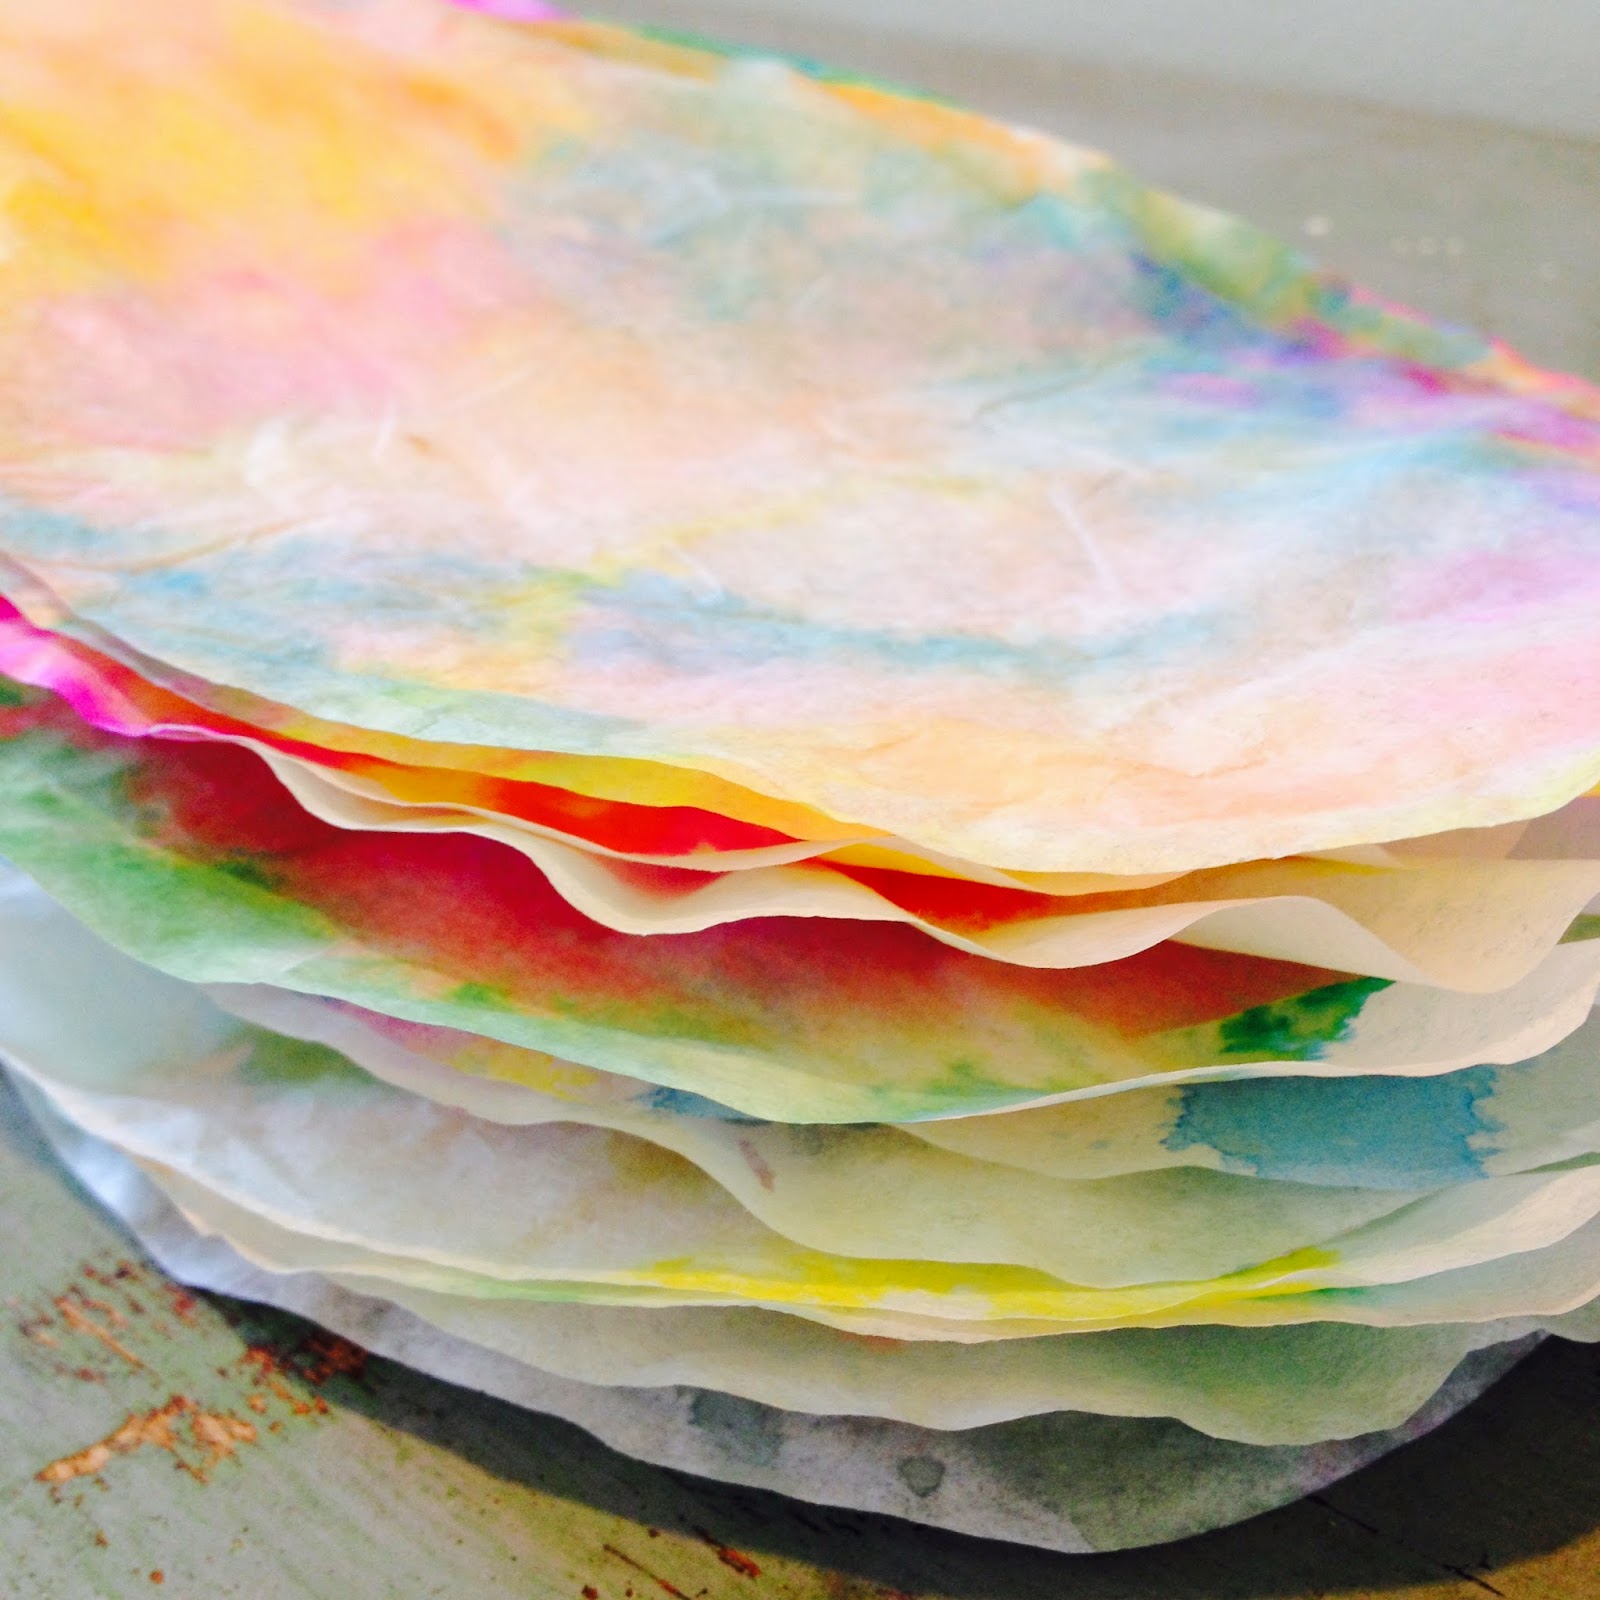
This year Chloe ended up just 'advising' us (watching and giggling at us) while we made some Easter eggs out of coffee filters. I'm planning on saving a few and hanging them on a window, and then we'll mail the rest out to family members this week.

This was something I thought of as I was pulling out art supplies for Liam. It was very easy and we only needed 3 supplies to make these:

1) Coffee filters, any size
2) Do-A-Dot markers

and 3) Plastic water droppers


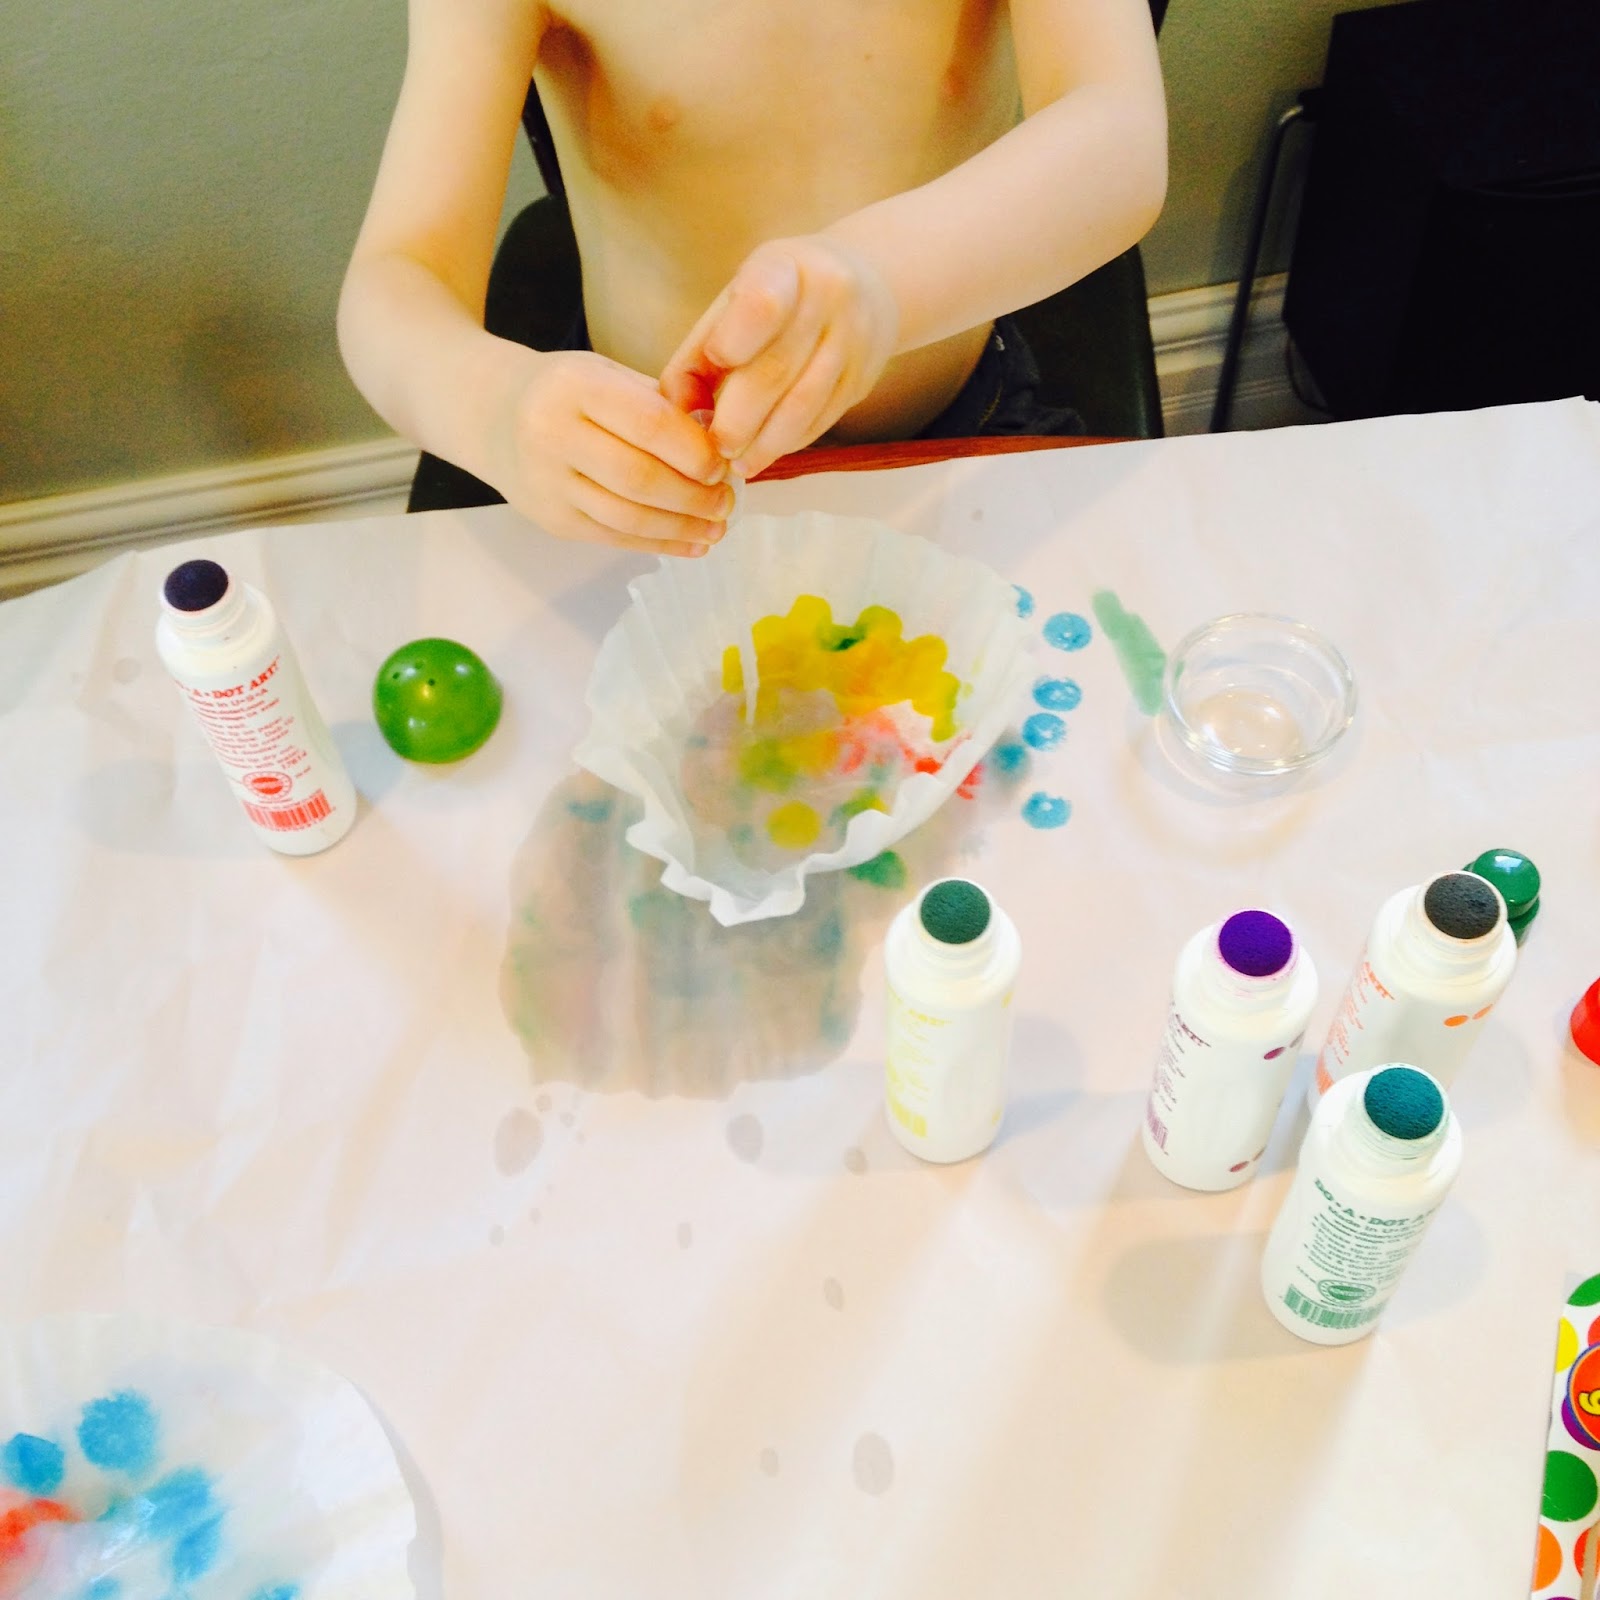
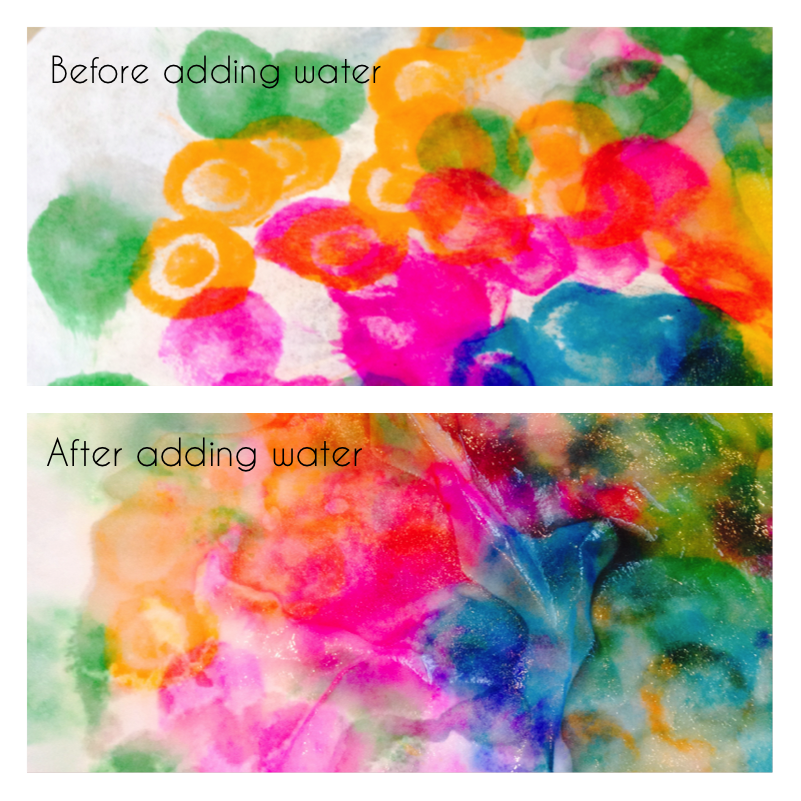
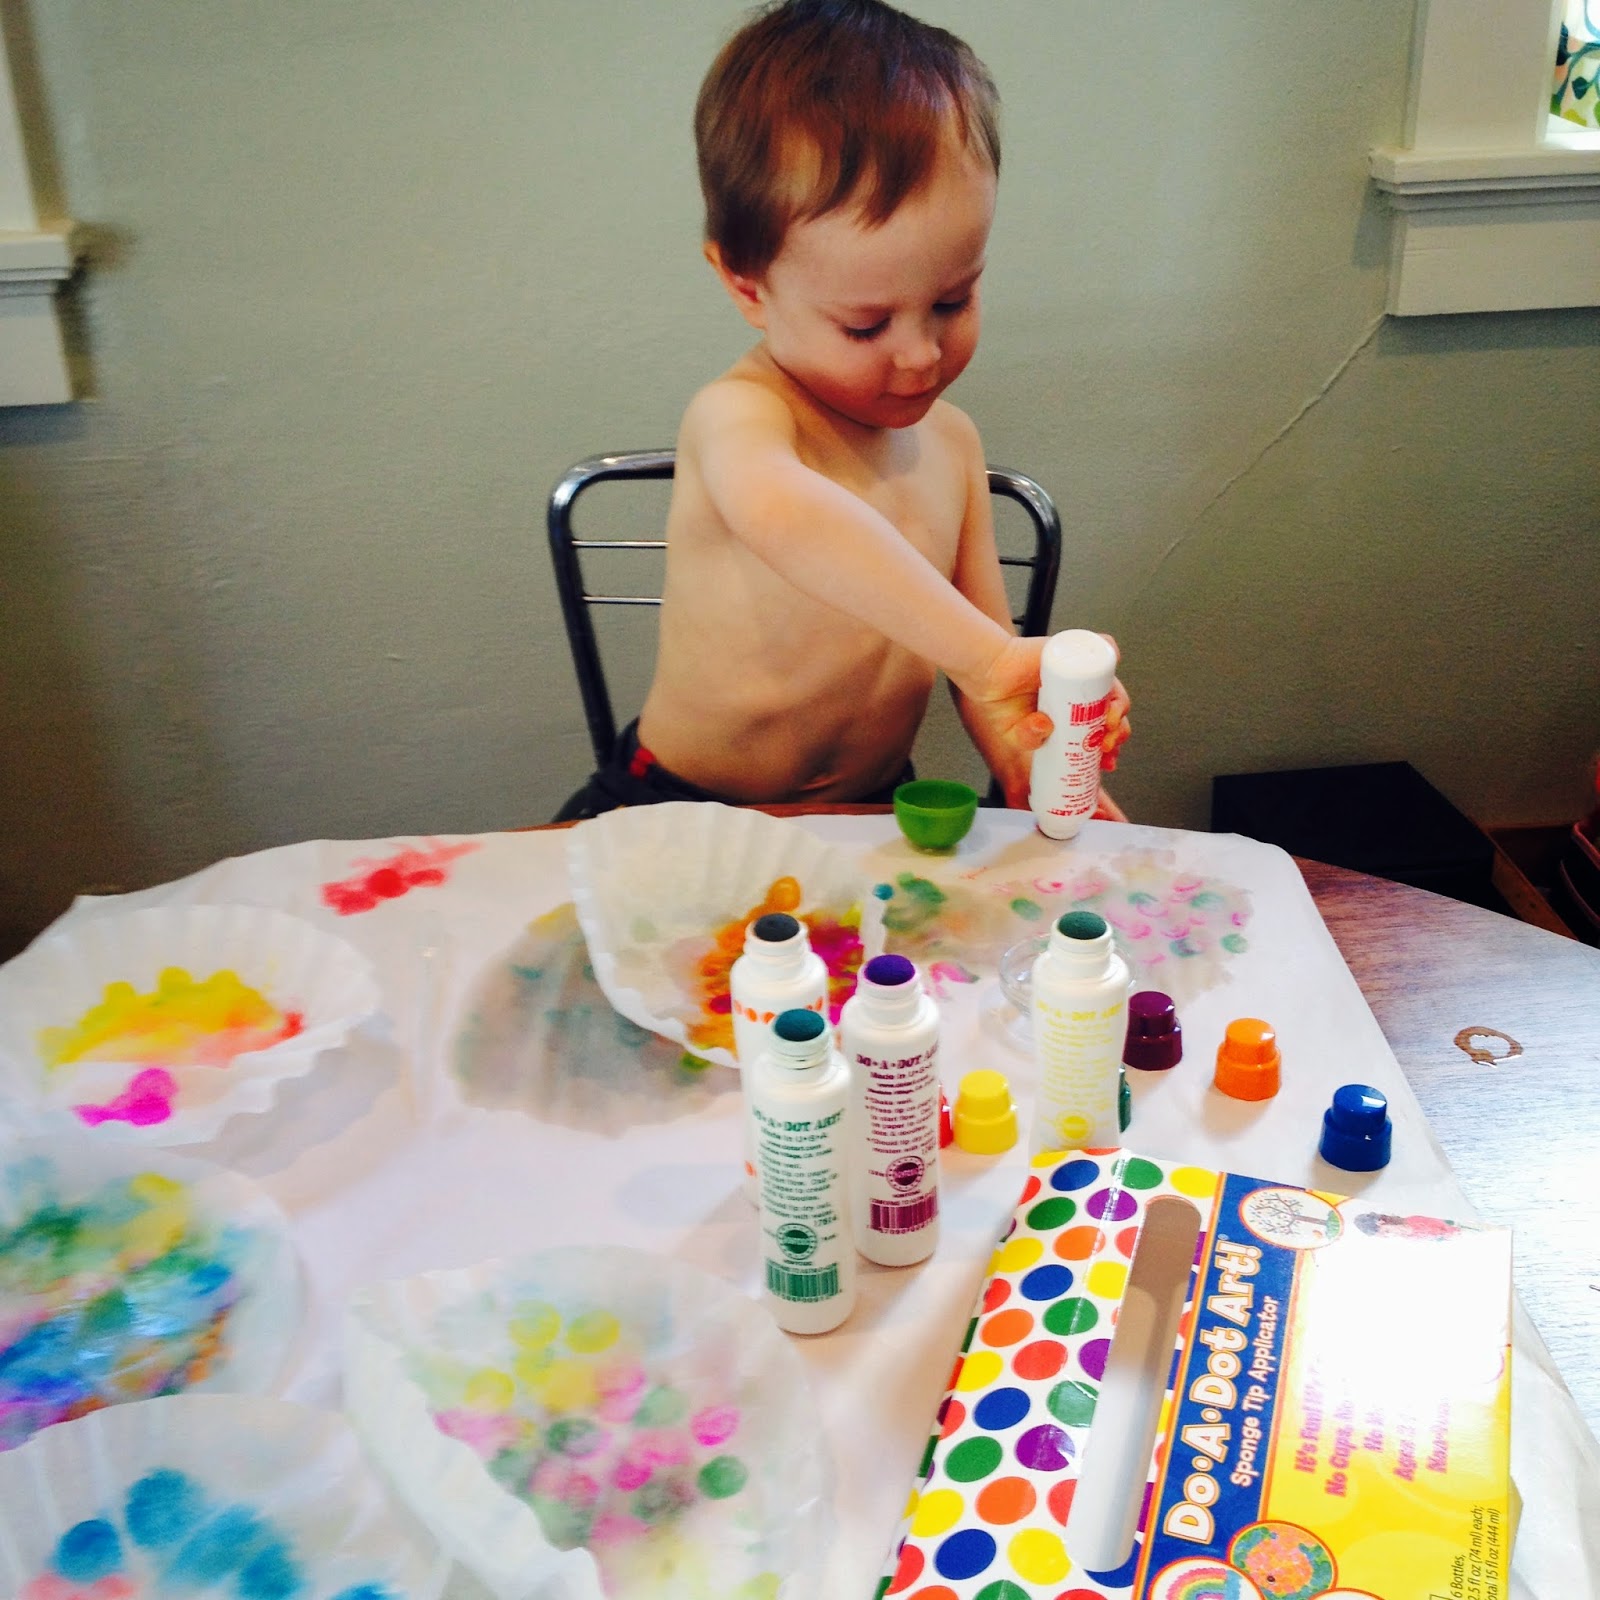
I laid out some paper on the table to absorb the expected watery mess. Then Liam decorated the coffee filters with an assortment of Do-A-Dot colors. 

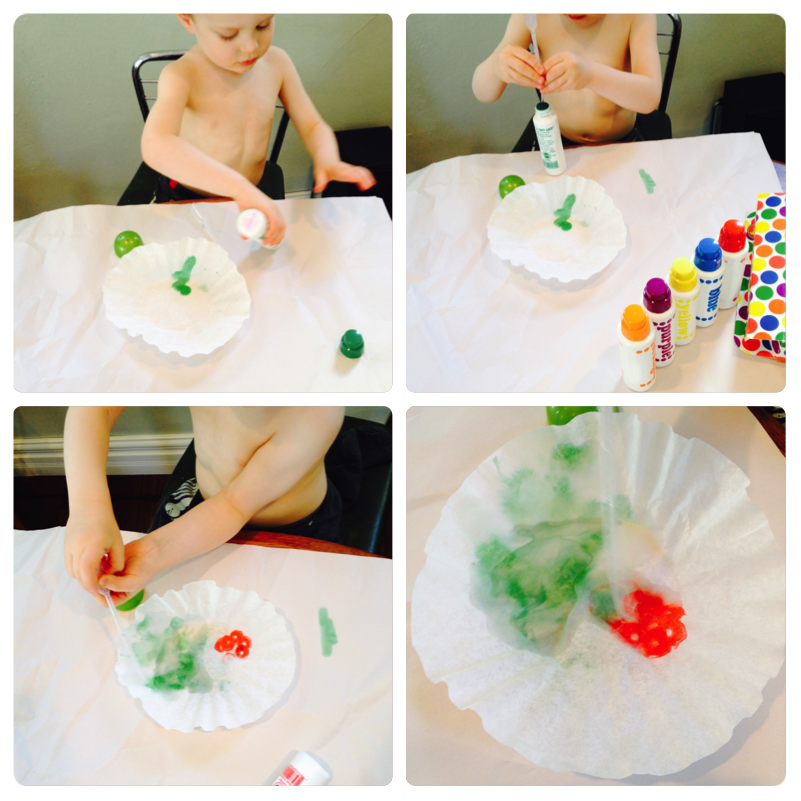
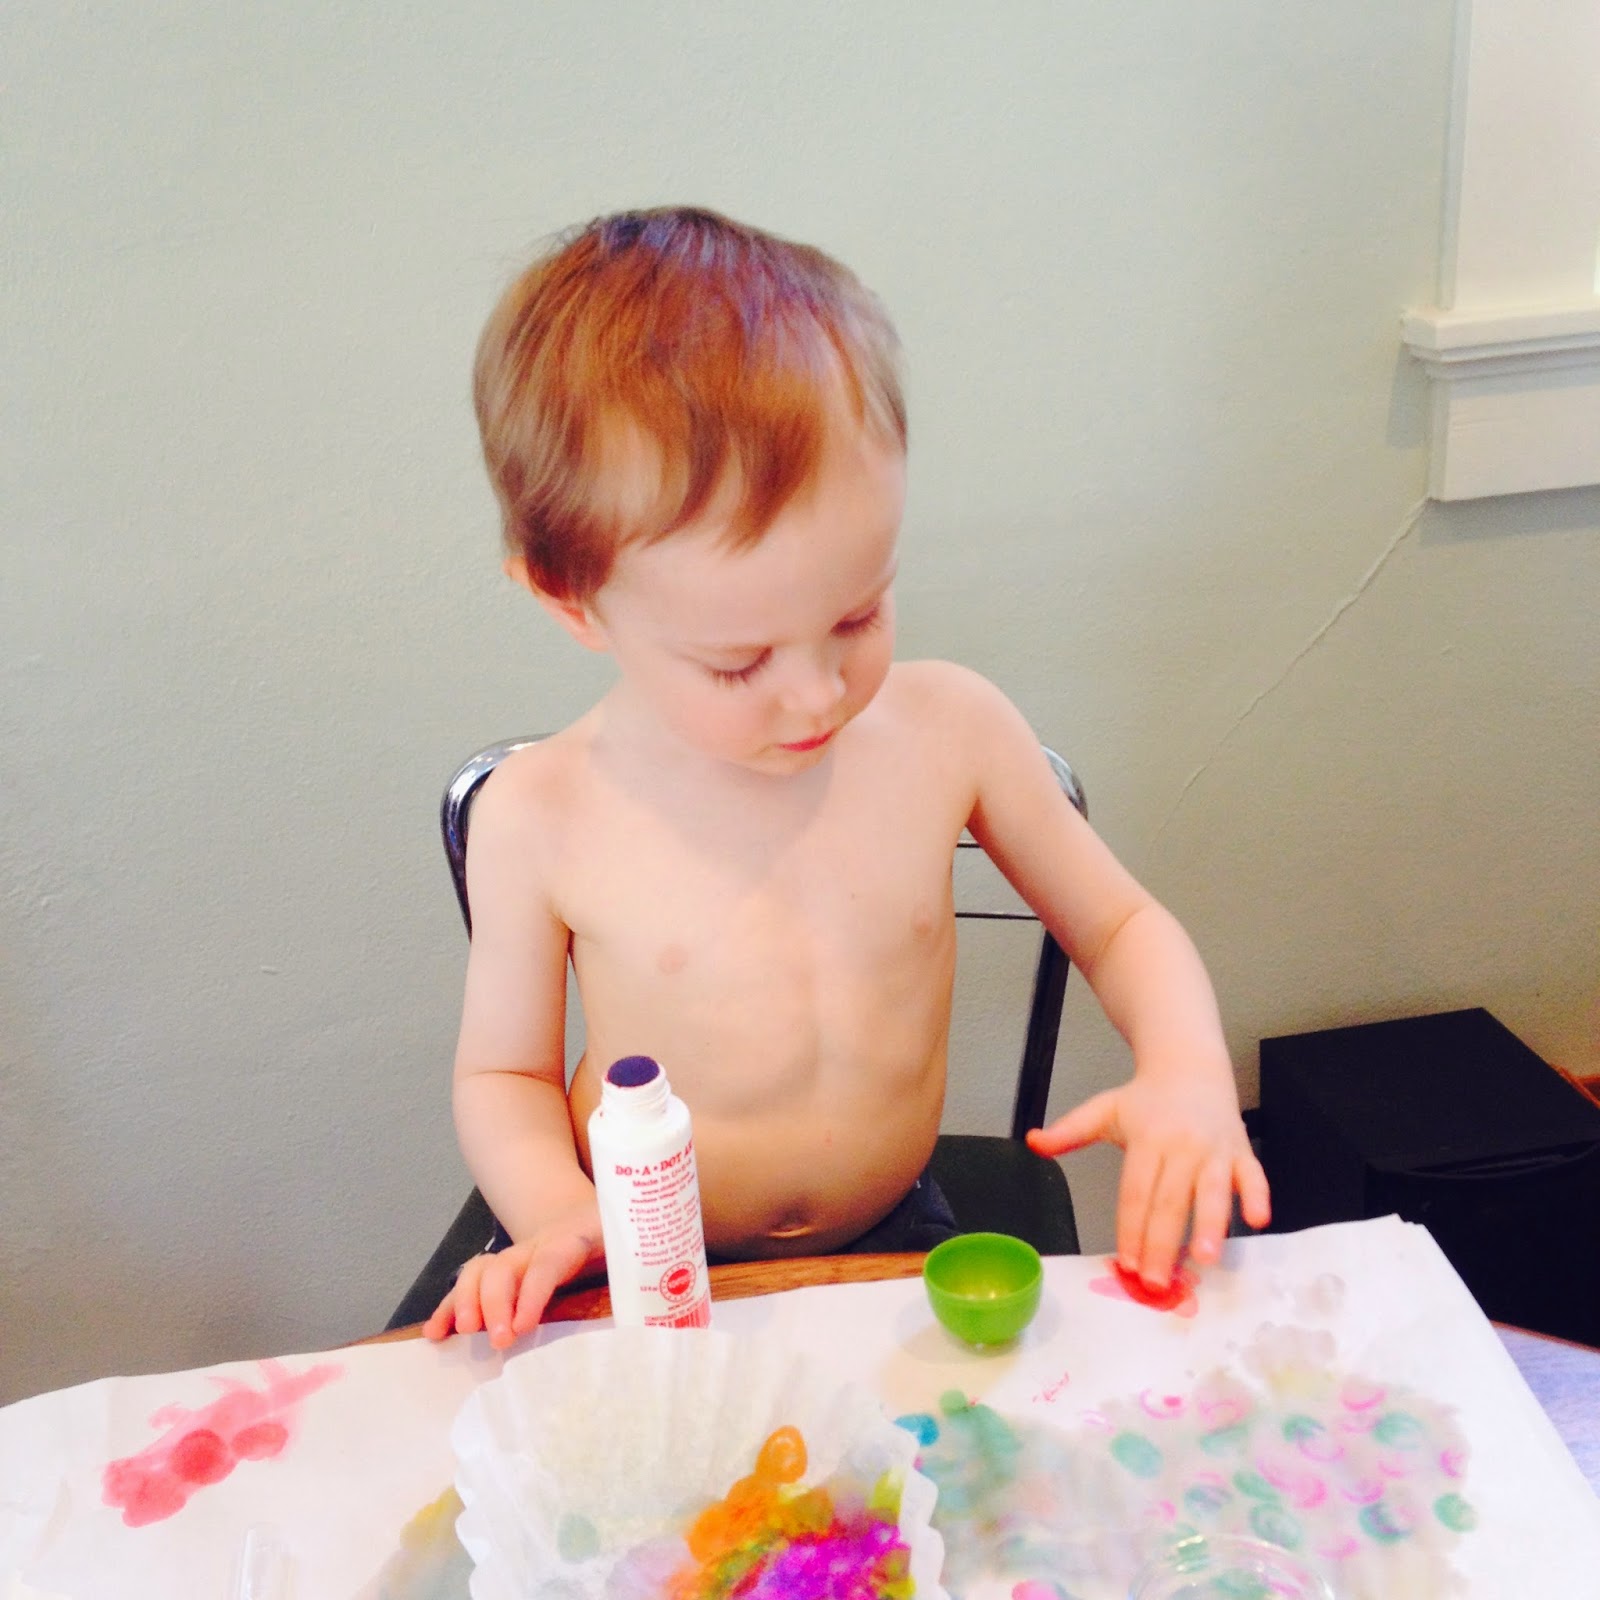
Then I gave him a little bowl of water and a plastic dropper. He gently (ha ha...who am I kidding) messily dropped water onto the coffee filter and watched the colors 'bleed' together. 


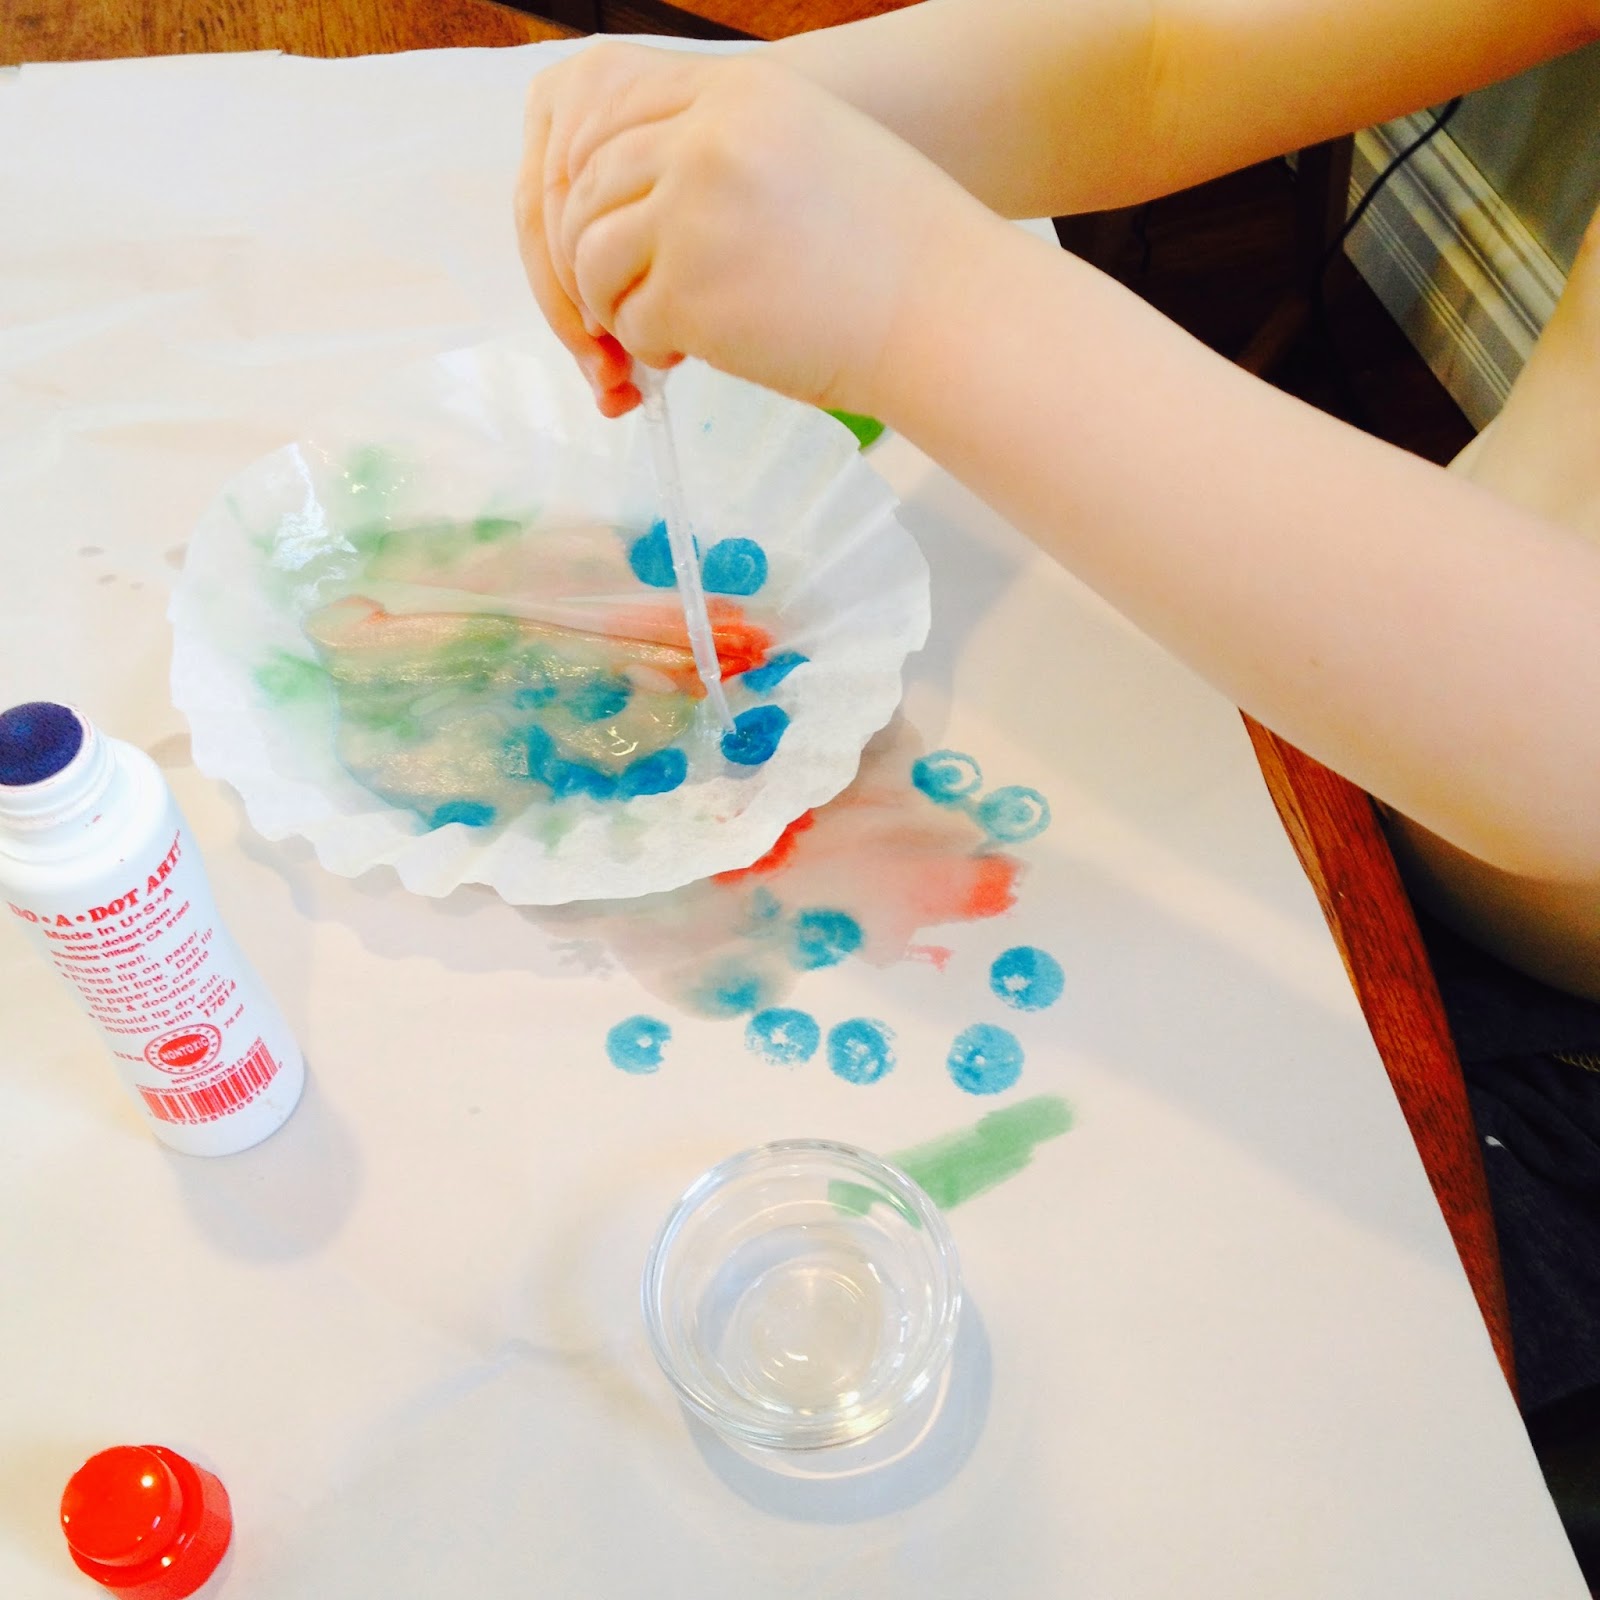
This was a bit of an art AND science experiment all in one :)

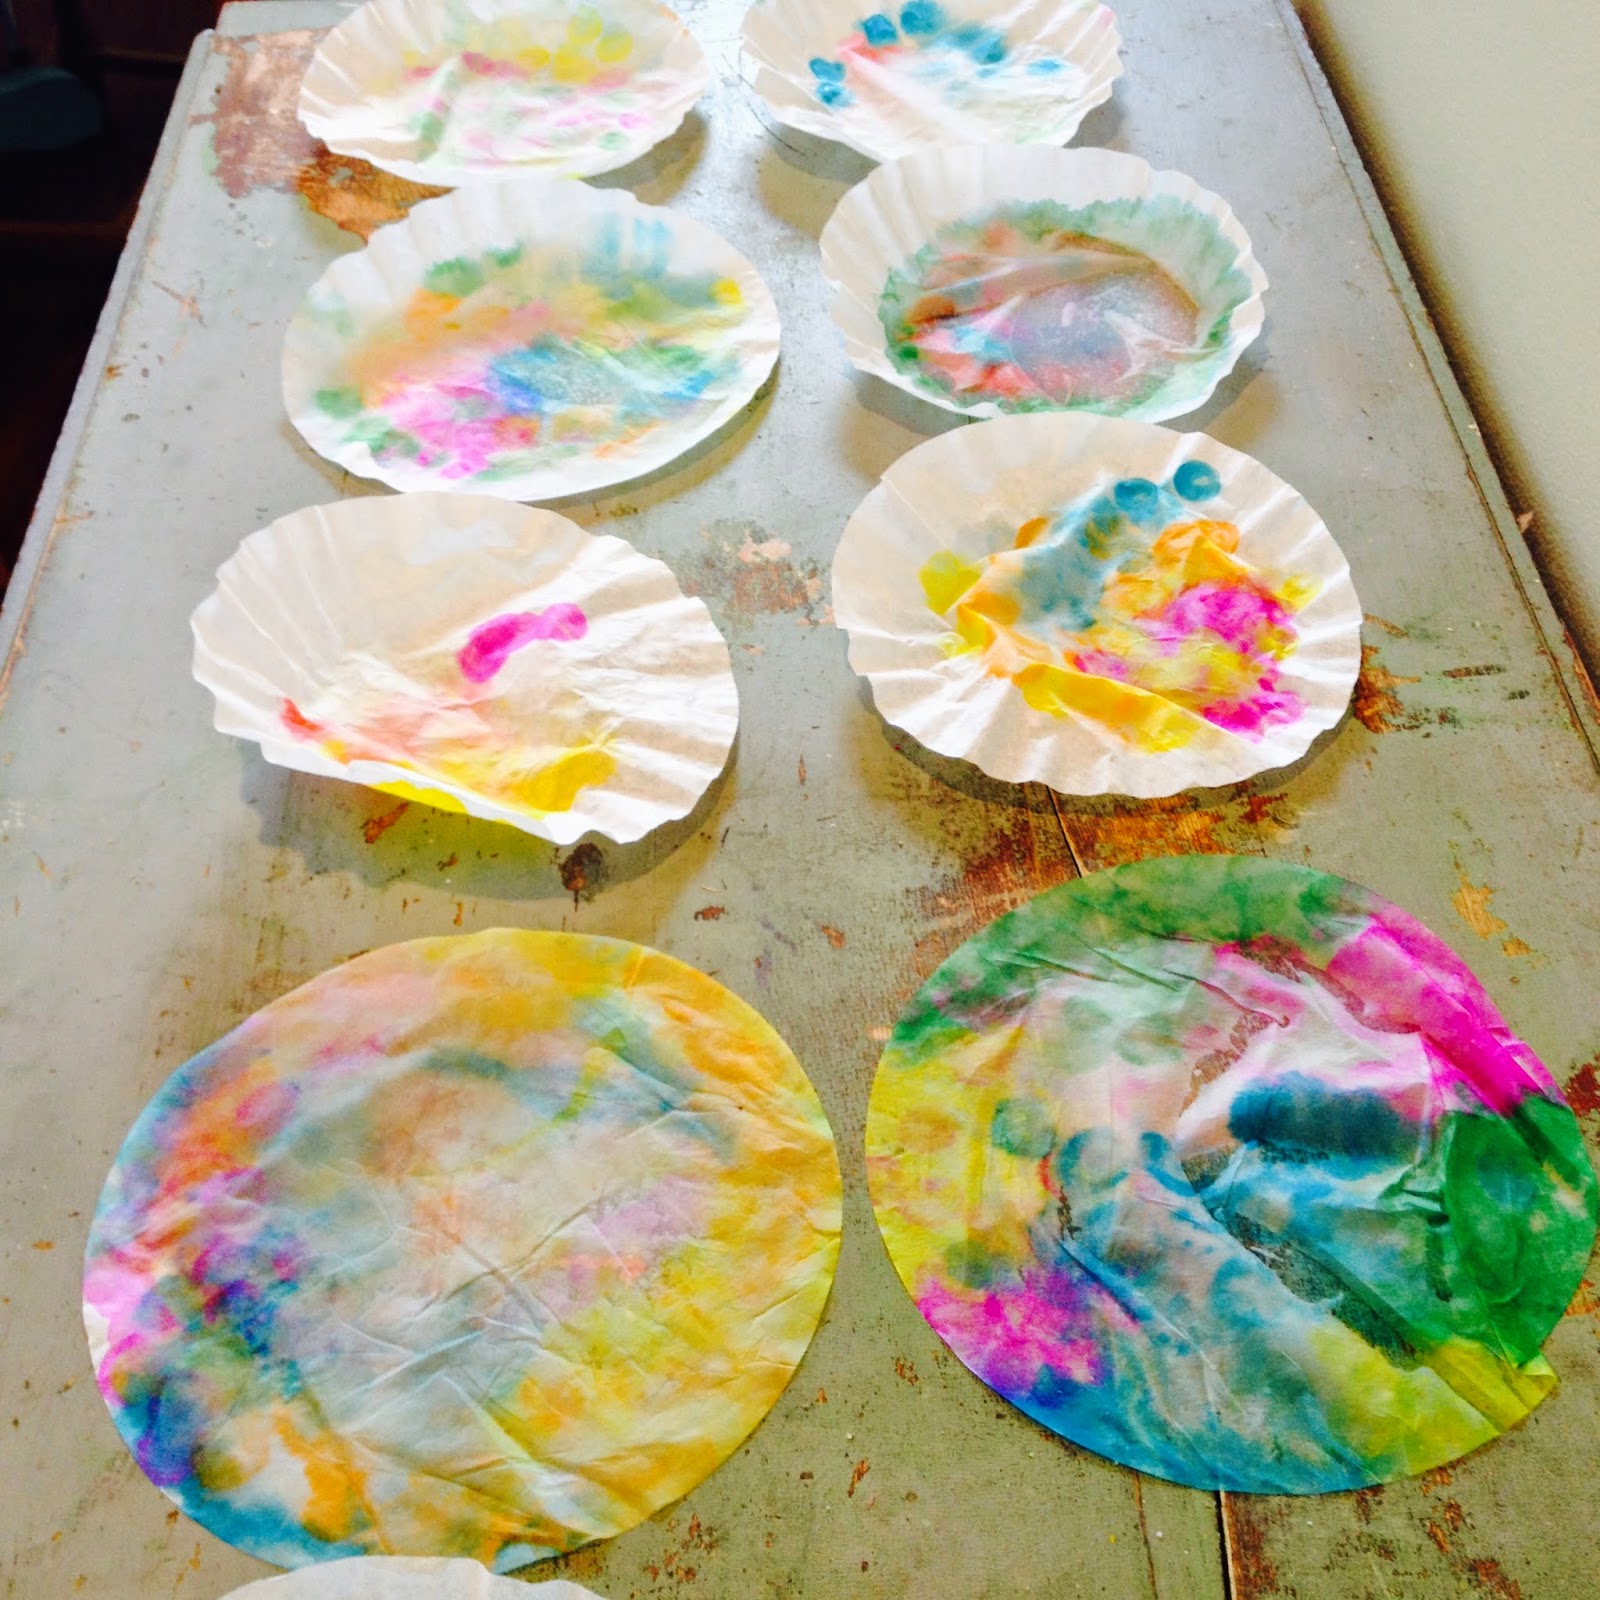
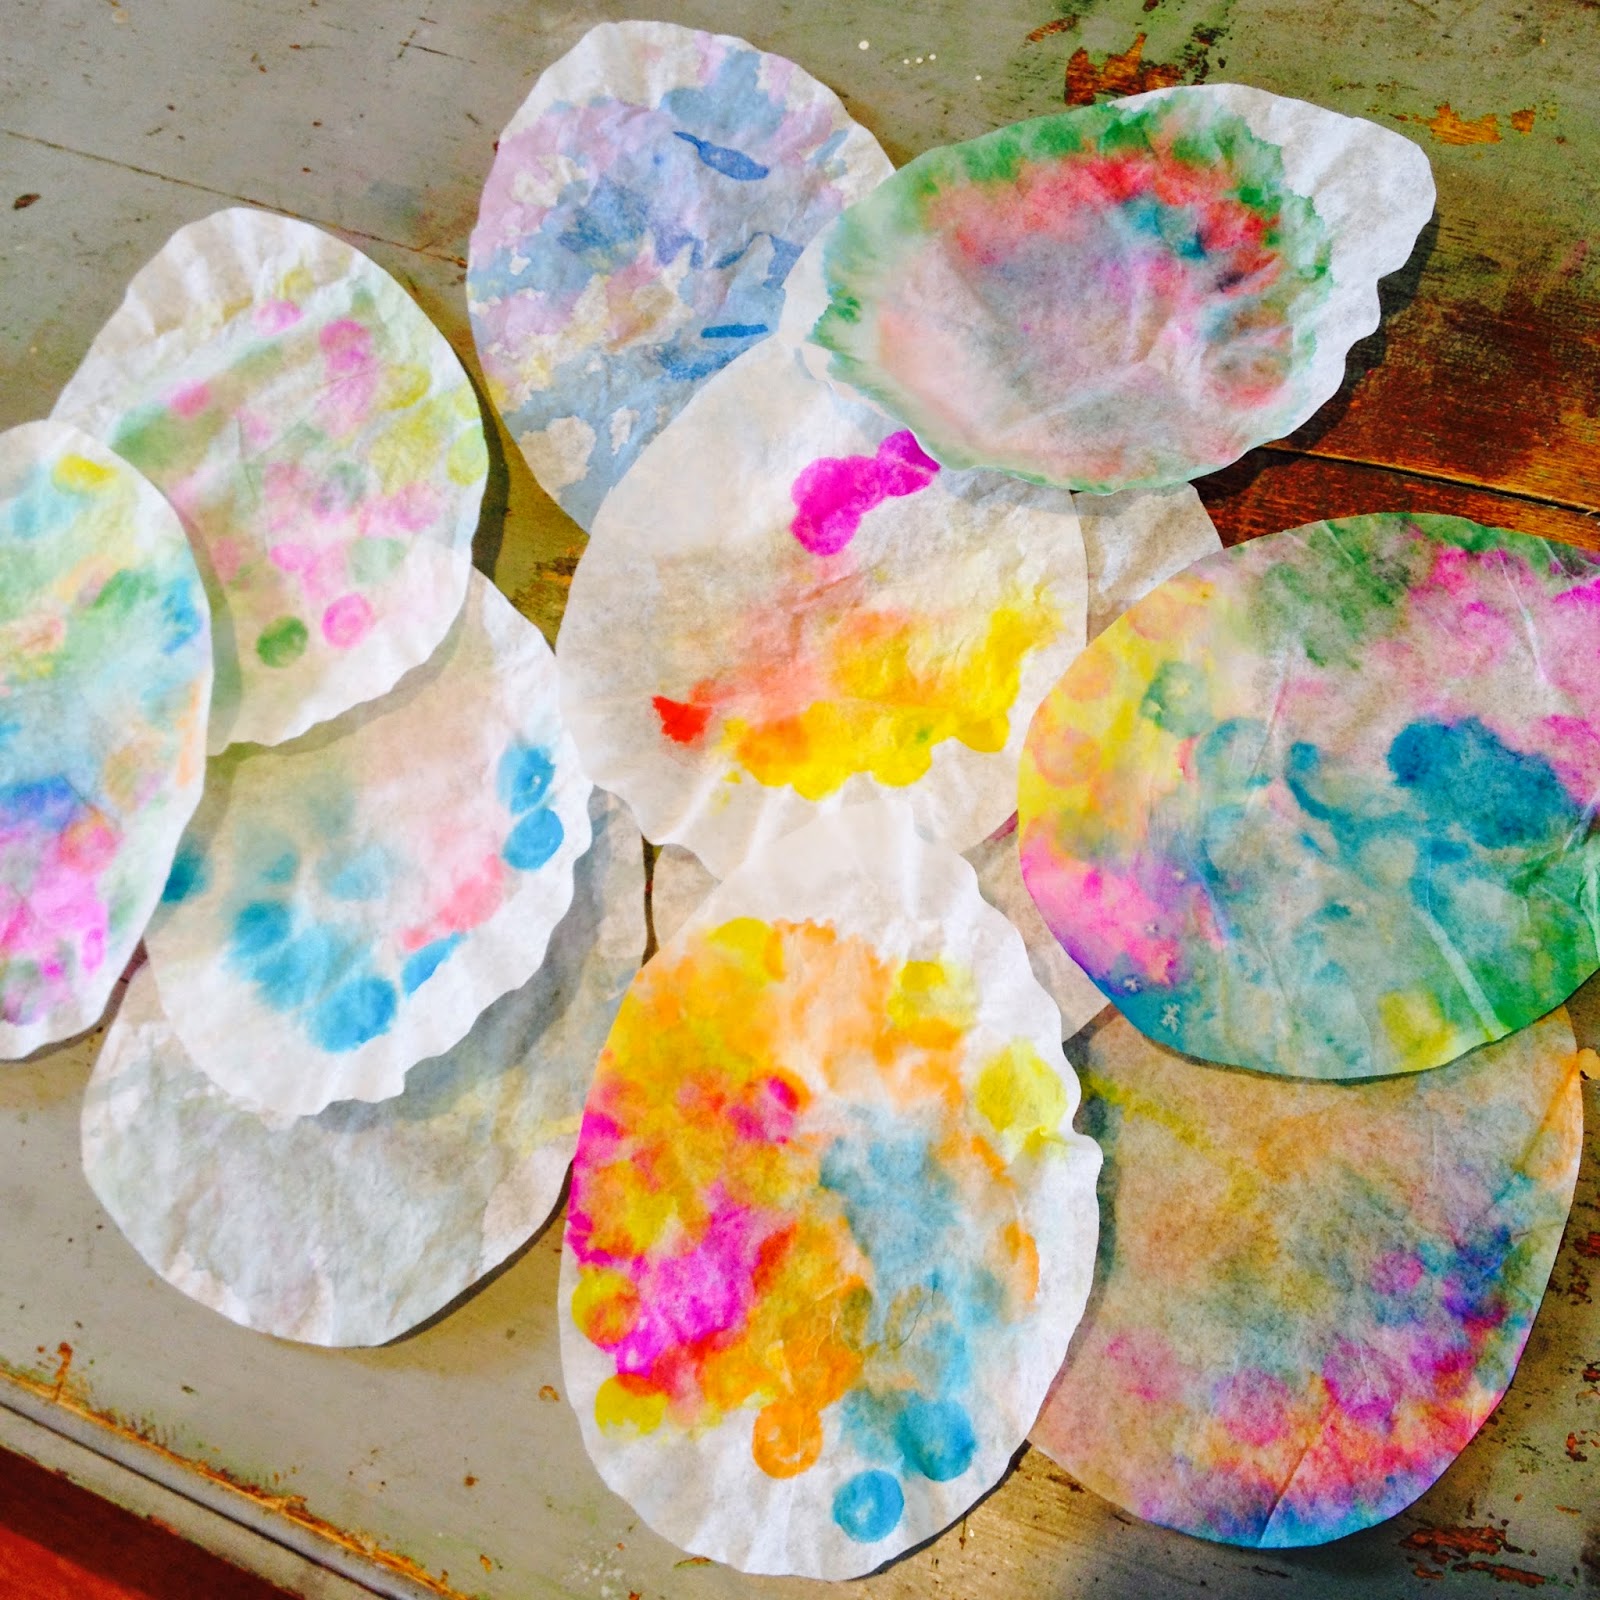
Once he realized how fun it was to squirt the water we were on a roll. He made ten of these in one sitting!


Then we laid them out to dry. They were dry in about an hour.


I cut them into egg shapes, trimming two sides of the filters off.


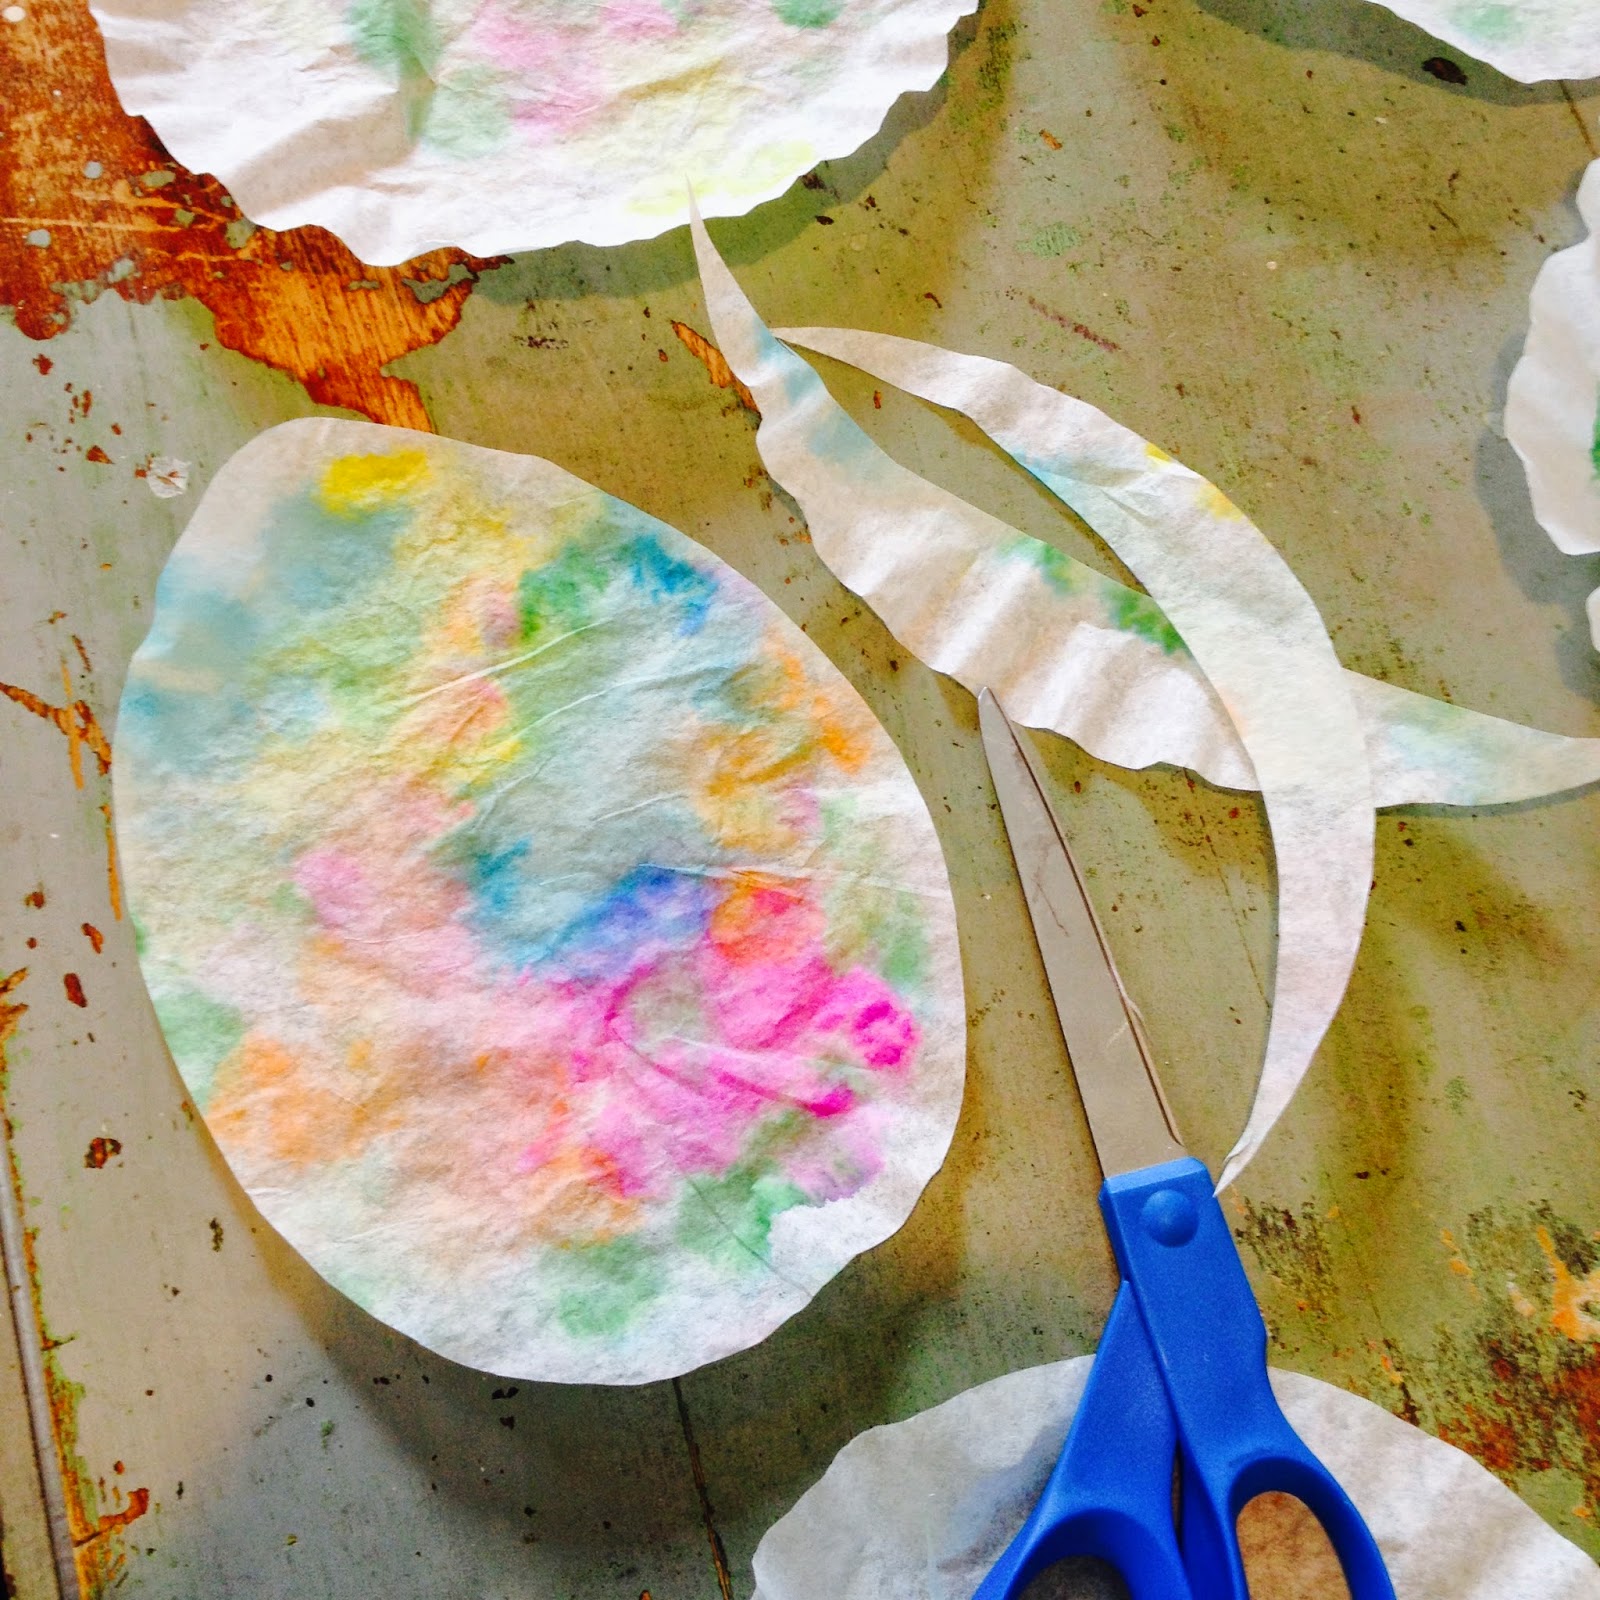
And here are our eggs!


Now we have to write "Happy Easter Grandma" etc on the back of them, stick them in envelopes and address them. And I'll have Liam and Chloe stick Easter stickers all over the envelopes.


A couple of tips:

- These took very little time and it was perfect for a 3 year old to do.

- If you don't have Do-A-Dot markers I'm pretty sure washable markers would work just as well.

- If you don't have plastic water droppers I bet a paint brush dipped in water and 'dripped' over the filters would work well too.


Let me know if you try this too!

Friday, March 27, 2015

Playing with clay


I hosted this month's Crafty Club recently. The evening was filled with crafting, cocktails and snacks. No hubbies or kids. Just a bunch of cool girlfriends hanging out and being creative. 

The seven of us take turns hosting. I really look forward to hosting because I get to pick out the craft and then show/teach it to everyone. Arts/crafts + sharing it with others = my passion :)

The craft I picked out was one I came across in a blog a few months ago. I didn't think up this craft in any way and take absolutely no credit for the idea (although I wish this is something I had thought of)! I fell in love with it when I saw it and just knew I had to do if for my next hosting gig.

The blog I saw it on is A Beautiful Mess (it's one of my new favorite blogs to follow). And the craft is Marbled Clay Ring Dish.

Ours did not turn out exactly like the ones on A Beautiful Mess, but I think that's what's so cool about this craft! Each dish you make turns out different from the rest. They're little works of art.

There's a great step-by-step tutorial on the Beautiful blog already, but I thought I'd show you the quick lowdown anyways:

All you need is a specific type of clay, a rolling pin, bowl, knife, kitchen oven and liquid leafing.
1 & 2 - Original Sculpey oven-bake clay in white
3 - A multi-color package of Sculpey oven-bake clay
4 - Liquid Leaf one-step leafing paint 
(I bought all of these materials at Hobby Lobby)


Aren't these colors fun? Liam thought so too (you can see his little hand grabbing at them)!


This is one of my dishes in a glass bowl, waiting to be baked in the oven. I did three
test-rounds prior to hosting the craft. I wanted to make sure I had the technique down.


Here's the dining room table, all set up for crafting.
Luckily I had 6 cheap IKEA cutting boards on hand, one for each lady.


And of course there's never a shortage of snacks at our gatherings....


....or drinks.


And here are some of our finished dishes!


We each ended up making two dishes, one big and one small.


And here are mine

I made three at three different times, and they ended up nestling together perfectly. I guess they were meant to be together :)

This one is my favorite. It was the very first one I made. 


We did not apply a glaze to seal them better. And they are not food safe by any means. But I think they're great for rings, earrings, bracelets, pins, paper clips, stray buttons....what would you put in these dishes? Please share!

And thank you A Beautiful Mess for the fun idea.

Tuesday, March 17, 2015

Things I'm Diggin' Part 1

Some completely random things I've been diggin' lately....


Why I love it: 
It isn't full of fake crap. It's ingredients are nonfat milk, heavy cream, sugar and natural flavor. It tastes good. And it's not so overpowering that you can't taste the coffee too.


Trumpette socks for babies
Why I love them:
They ACTUALLY stay on Chloe's feet! These (and Old Navy's) are the only socks that Liam, and now Chloe, seem to keep on their feet. Like all day on their feet. It's a miracle.


Why I love them:
Chloe loves them, Liam loved them. I give her a rusk and it keeps her happy for ten minutes. She eats the entire thing and they are NOT messy (especially compared to the Plum Organics Little Yums - which are so, so messy). No artificial colors or preservatives. Just rice/potato starch/sugar/sea salt. And you can buy them at Target.


Why I love it:
(It's pricey) but it does not clump at all! Every mascara I've ever bought eventually clumps. And because I've recently developed contact dermatitis from many cosmetics, this one does not cause me to have a reaction! It goes on great/stays on great. It's non-toxic and it doesn't smell.


 Why I love it:
It's so much fun! I picked up some packages at HobLob recently and have been messing around making some things with it. It's so easy to use and the colors are great. It feels good to get my hands on some art supplies again...


Why I love them:
They're so soft. They're fun. They're thin, which is nice for Springtime. And the Shea lasts within the socks for up to 25 washes in the machine. I bought this exact pair for myself for Valentine's Day :)


Why I love it:
It tastes really darn good. It tastes like actual home-made lemonade. And it's not too citrusy where you get a stomachache or heartburn afterwards. It's not too sweet & not too sour. For me it's just right. And the ingredients are water/sugar/lemon juice/lemon pulp & lemon oil. That's it. It tastes good with vodka in it too.


Why I love it:
I swear by this stuff! It is my new miracle product. It's inexpensive ($8 at Target and it lasts a few months), smells good, feels good, works good. It's organic and packed full of essential oils. It's another product I've found that's completely okay for my face and skin (it does not cause dermatitis). I'm going to start giving this to people as gifts!


Why I love it:
I love maple-anything, so this is a delicious yogurt to me. It's a 'runny' style yogurt, which I prefer over the thick stuff. The cows' milk the yogurt is made of comes from happy cows (grazing, open air milking, grass fed) and the ingredients are simple whole milk/organic agave nectar/maple syrup/ginger/cultures. It's more expensive than Yoplait, but I think it's worth the flavor and ingredients. And I think it tastes great on top of waffles or with oatmeal & dates. Liam loves it too.


Why I love it:
The songs are upbeat and it's hard not to move around when you hear it.  And if you don't agree, then I guess 'haters gonna hate.'  Liam, Chloe and I play this album almost every day and we dance, dance, dance. 


Okay -- so what are you diggin' lately?
Please share!


______________________________________

Also, you may have noticed I changed the template and look of my blog? I'm pretty excited about it and it's a work in progress. Stay tuned for a few more changes...